
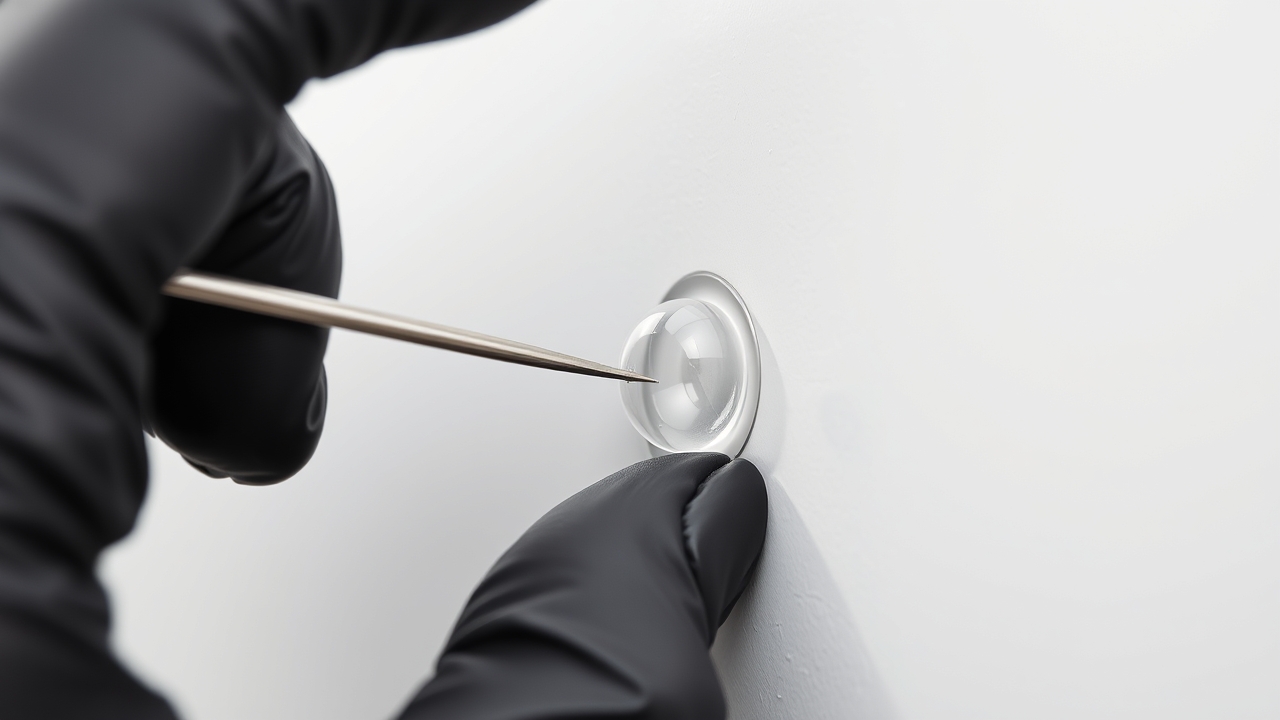
You just finished applying a set of vinyl letters to your work truck door, stepped back to admire the result, and spotted a bubble. Or five. A vinyl bubbles fix is almost always possible, and in most cases takes under ten minutes. The key is acting fast and knowing which method fits the situation.
Why Air Bubbles Form in Vinyl Lettering
Bubbles happen when air gets trapped between the adhesive layer and the substrate during installation. It is a mechanical issue, not a material defect. Oracal 651, 3M Scotchcal, and virtually every other cast or calendered vinyl will bubble if the installation conditions are off.
The most common causes:
- Cold or damp surfaces. Below 50 degrees Fahrenheit, adhesive does not flow well enough to displace air pockets as you squeegee.
- Contaminated surface. Wax, silicone, road grime, or even finger oils create micro-barriers the adhesive cannot bond through.
- Rushing the squeegee pass. Going too fast, or skipping overlapping strokes, lets air pockets get sealed in before they escape.
- Thick or textured substrate. Riveted trailer panels, textured fleet vans, and orange-peel paint finishes trap more air than smooth glass or flat metal.
- Film too cold. Vinyl that sat in a cold truck or warehouse overnight needs time to warm to room temperature before installation. Cold film is stiffer and less forgiving.
Small Bubbles vs. Large Bubbles
Size matters for which fix you choose. Bubbles under a quarter inch are almost always fixable in place. Bubbles over an inch, or clusters of bubbles covering a large section, sometimes indicate a substrate issue or contamination that needs addressing before the vinyl can bond properly.
Vinyl Bubbles Fix: Within 24 Hours of Application
Fresh vinyl is your best window. The adhesive has not fully cured yet, so the film is still repositionable and the adhesive is soft enough to flow into voids. We tell customers: if you notice a bubble on the same day you applied, start here.
The Warm Finger Press Method
For very small bubbles (smaller than a dime), try warming the bubble with your palm or a heat gun set to low (around 150 degrees Fahrenheit), then pressing firmly from the center of the bubble outward with your thumb. Work the air toward the nearest edge of the vinyl letter. This works surprisingly often on cast films like Oracal 651 because they are thin and conformable.
Re-Squeegee While Warm
If you have a hard felt squeegee (or even a credit card wrapped in a soft cloth), apply moderate heat with a heat gun, then squeegee from the center of the bubble outward with firm, even pressure. Keep the squeegee moving at a consistent pace. Repeat 2 to 3 times, letting the vinyl cool slightly between passes.
The Heat Method for Stubborn Bubbles
Heat softens the vinyl and makes the adhesive more fluid. A standard craft heat gun or even a hair dryer on high will work. The target temperature is roughly 150 to 180 degrees Fahrenheit at the surface; you can use an infrared thermometer, or just test by pressing your finger quickly (it should feel hot but not burn immediately).
Steps:
- Hold the heat gun about 4 to 6 inches from the bubble. Move it in small circles. Do not hold it still or you risk burning the vinyl.
- Once the film feels pliable (5 to 10 seconds), immediately squeegee from the interior of the bubble outward toward the edge.
- Maintain light pressure on the area while it cools. This helps the adhesive re-bond flat.
- Check after 60 seconds. Repeat if the bubble resurfaces.
On textured surfaces like the embossed panels of a cargo van, you may need 3 or 4 heat-and-squeegee cycles. The adhesive needs time to flow into the surface texture valleys.
The Needle Method: The Professional’s Go-To Vinyl Bubbles Fix
This is the most reliable technique for stubborn bubbles, especially on installed lettering that has been on a vehicle for more than a day. It sounds risky, but done correctly it leaves no visible mark.
What You Need
- A sharp sewing needle or pin (not a safety pin, those are too thick)
- A heat gun or hair dryer
- A hard squeegee or a credit card
The Process
Warm the bubble with heat for 5 to 10 seconds. Then hold the needle nearly parallel to the vinyl surface (at about a 20-degree angle) and pierce the edge of the bubble, not the center. Working at a shallow angle prevents the hole from widening. Immediately press the film flat with your finger or squeegee, pushing the air through the pinhole you just made. While still pressing, apply a little more heat. The adhesive flows back and seals around the tiny hole. On Oracal 651 or 3M Scotchcal IJ180, a properly done needle repair is effectively invisible from more than 12 inches away.
How to Prevent Bubbles in the First Place
We have been cutting and shipping vinyl lettering since 2003. After two-plus decades, prevention advice is short and repeatable.
- Clean the surface thoroughly. Use isopropyl alcohol (70 percent or higher) and a lint-free cloth. Do not use wax-based cleaners before vinyl application. Let the surface dry completely, at least 2 minutes.
- Work above 60 degrees Fahrenheit. Both the vehicle surface and the vinyl film should be above this threshold. If you are applying in a garage in November, warm the work area first.
- Use the wet method for large letters. Adding a few drops of baby shampoo to a spray bottle of water and misting the vehicle surface allows you to reposition large letters before squeegeeing out the liquid. It adds a step but nearly eliminates bubbles on flat panels.
- Overlap your squeegee strokes. Each pass should overlap the previous one by at least half the squeegee width. Work from the center outward, or from top to bottom on tall letters.
- Post-heat the installation. After the vinyl is down and bubble-free, a final pass with a heat gun (and firm pressure from a squeegee) helps the adhesive flow fully into the substrate and dramatically reduces the chance of bubbles appearing later.
If you are applying letters to a ribbed or corrugated trailer, check out our guide on how to apply vinyl letters to truck doors for surface-specific techniques that make a real difference.
When to Peel and Re-Apply
Sometimes the bubble problem is systemic, not isolated. If you have more than a quarter of a letter’s surface area covered in bubbles, or if bubbles keep returning after multiple heat-and-needle attempts, the adhesive bond has likely failed due to contamination or temperature shock. The honest move is to pull the letter, prep the surface properly, and re-apply.
Peeling a fresh letter (within 48 hours) is straightforward. Warm it with a heat gun and pull slowly at a low angle. On older lettering, the process is more involved. See our vinyl lettering product page for guidance on replacement and custom re-orders.
| Bubble Type | Best Fix | Time Needed | Skill Level |
|---|---|---|---|
| Tiny (under 1/4 inch), fresh | Warm finger press | 1-2 min | Beginner |
| Medium, within 24 hours | Heat + squeegee | 5-10 min | Beginner |
| Stubborn, any size, any age | Needle method | 5-15 min | Intermediate |
| Widespread, returning bubbles | Remove and re-apply | 30-60 min | Intermediate |
Frequently Asked Questions
Will small vinyl bubbles go away on their own?
Sometimes very tiny bubbles (smaller than a pencil eraser) will flatten out over a week or two as the adhesive continues to cure and bond. However, this is not reliable. Larger bubbles will not self-correct and tend to worsen over time as edges catch air during car washes or highway driving. Fix them early.
Can I use a pin or toothpick instead of a sewing needle?
A toothpick is too blunt and will leave a visible divot. A safety pin works but creates a larger hole than a sewing needle. A standard sewing needle (#9 or #10 sharps) is the right tool. It is thin enough that the hole seals invisibly after you press the vinyl flat and reheat the area.
My vinyl bubbles came back after I fixed them. What is happening?
Returning bubbles usually signal a contamination issue on the substrate. Silicone, wax, or road film is preventing the adhesive from making a clean bond. If bubbles return in the same spot, clean the area with isopropyl alcohol after peeling the letter, let it fully evaporate, and re-apply. On freshly painted vehicles, outgassing from new paint can also cause this; ideally wait 30 days after a repaint before applying vinyl.
Does the needle hole affect how long the vinyl lasts?
No, not in any practical way. A properly done needle repair on Oracal 651 or 3M Scotchcal does not create a point of entry for moisture or a starting point for peeling. The adhesive flows back around the hole during the post-heat step. We have lettering in the field with needle repairs that has held for 4-plus years without issue.
Is this different for matte vinyl versus gloss vinyl?
The fixing technique is the same, but be more careful with heat on matte films. Excessive heat can create a shiny spot where the matte texture gets flattened. Keep the heat gun at a safe distance (6 inches or more) and use shorter bursts.
How long after application is too late to fix a bubble?
There is no hard cutoff. Bubbles fixed within the first 24 hours are easiest. Bubbles on vinyl that has been on a vehicle for months or years can still be fixed with the needle method. The adhesive is fully cured at that point, which actually makes the needle repair seal faster. The limit is really the condition of the vinyl itself; if the film is faded or brittle, heat application can crack it.
Next Steps
If you caught your bubble early and fixed it, great. If your lettering is due for a refresh, or you need a replacement set, we cut custom vinyl letters in over 60 fonts from Oracal and 3M materials right here in Indiana. Visit create vinyl lettering to build your set, or upload your artwork if you have a logo ready to go. We ship nationwide, typically within 1 to 3 business days.
